Hub Selection and Channel Opening
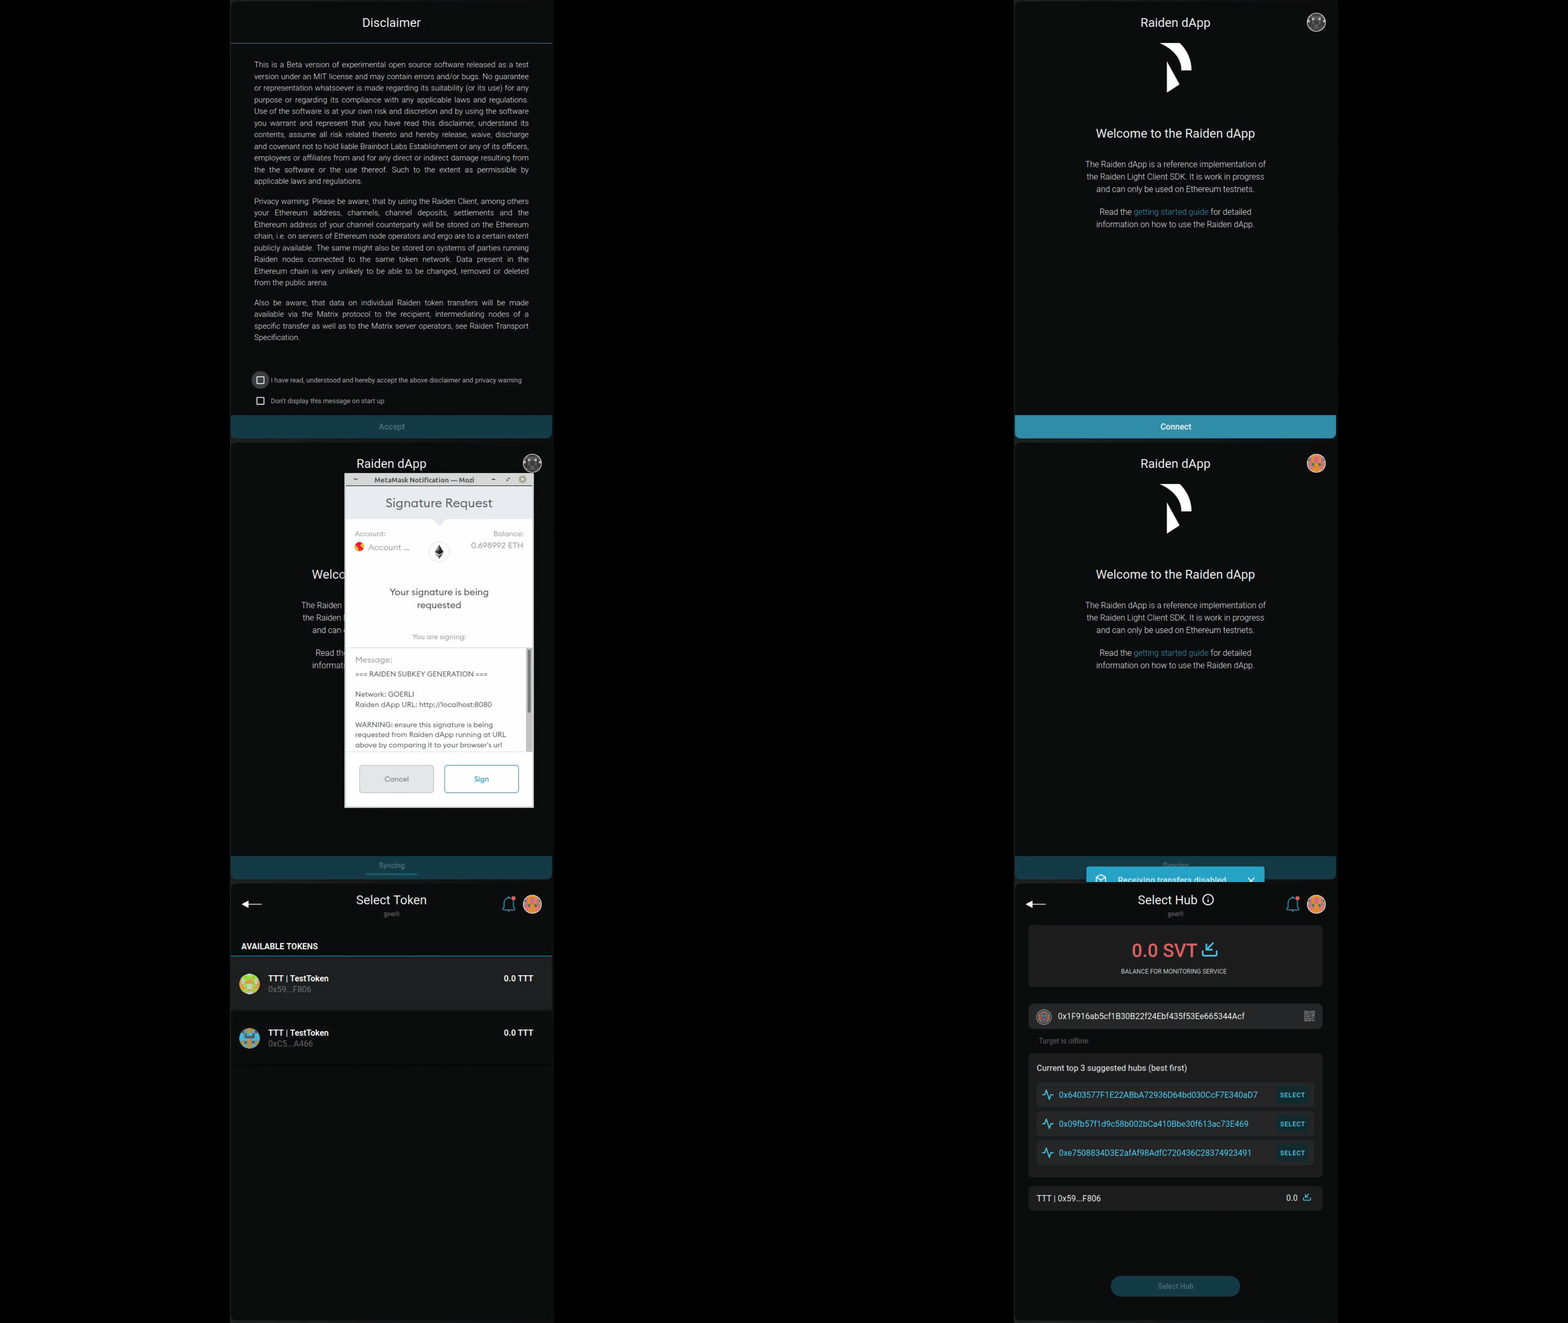
Once you sign the MetaMask prompt to create a Raiden Account you will come to a screen where you will be prompted to connect a new token. You might also get a snackbar at the botton of the screen informing you that receiving transfers is disabled.
Receiving Transfers disabled - this is a security feature and a notification is
given when there are not enough funds to pay for the Raiden services, like the monitoring service

Select Hub

On the Select Hub screen There are two tokens available which will briefly be described here:
- SVT tokens(RDN tokens on mainnet)
- TTT TestToken (DAI or WETH on the mainnet)
The SVT token which is the service token, is used to pay for the Raiden services, PFS (Path Finding Service) and MS (Monitoring Service). For testnets the service tokens can be minted and then deposited to the UDC directly in the Raiden dApp. This is done by clicking the button on the right side next to the token amount.
The TTT TestToken is the token which will be used for transfers with a counterparty when sending or receiving micropayments. On testnet the token can be minted by clicking on the button to the right of the amount.
The HUB is usually a well connected node with which a channel can be opened. If well connected hubs are available for the token network, a list of the top three are suggested. You can go ahead and open channels with any of the suggested hubs, or if you know any node in the network you can open a channel by entering the address of that node.
Mint or Acquire Tokens

Minting tokens can only be done on testnets. On Goerli, for instance, that would be the SVT and TTT token (or any other token which supports minting).
On mainnet, the tokens needs to be acquired independently. The dApp assists in this by providing a link to Uniswap where tokens can be exchanged.

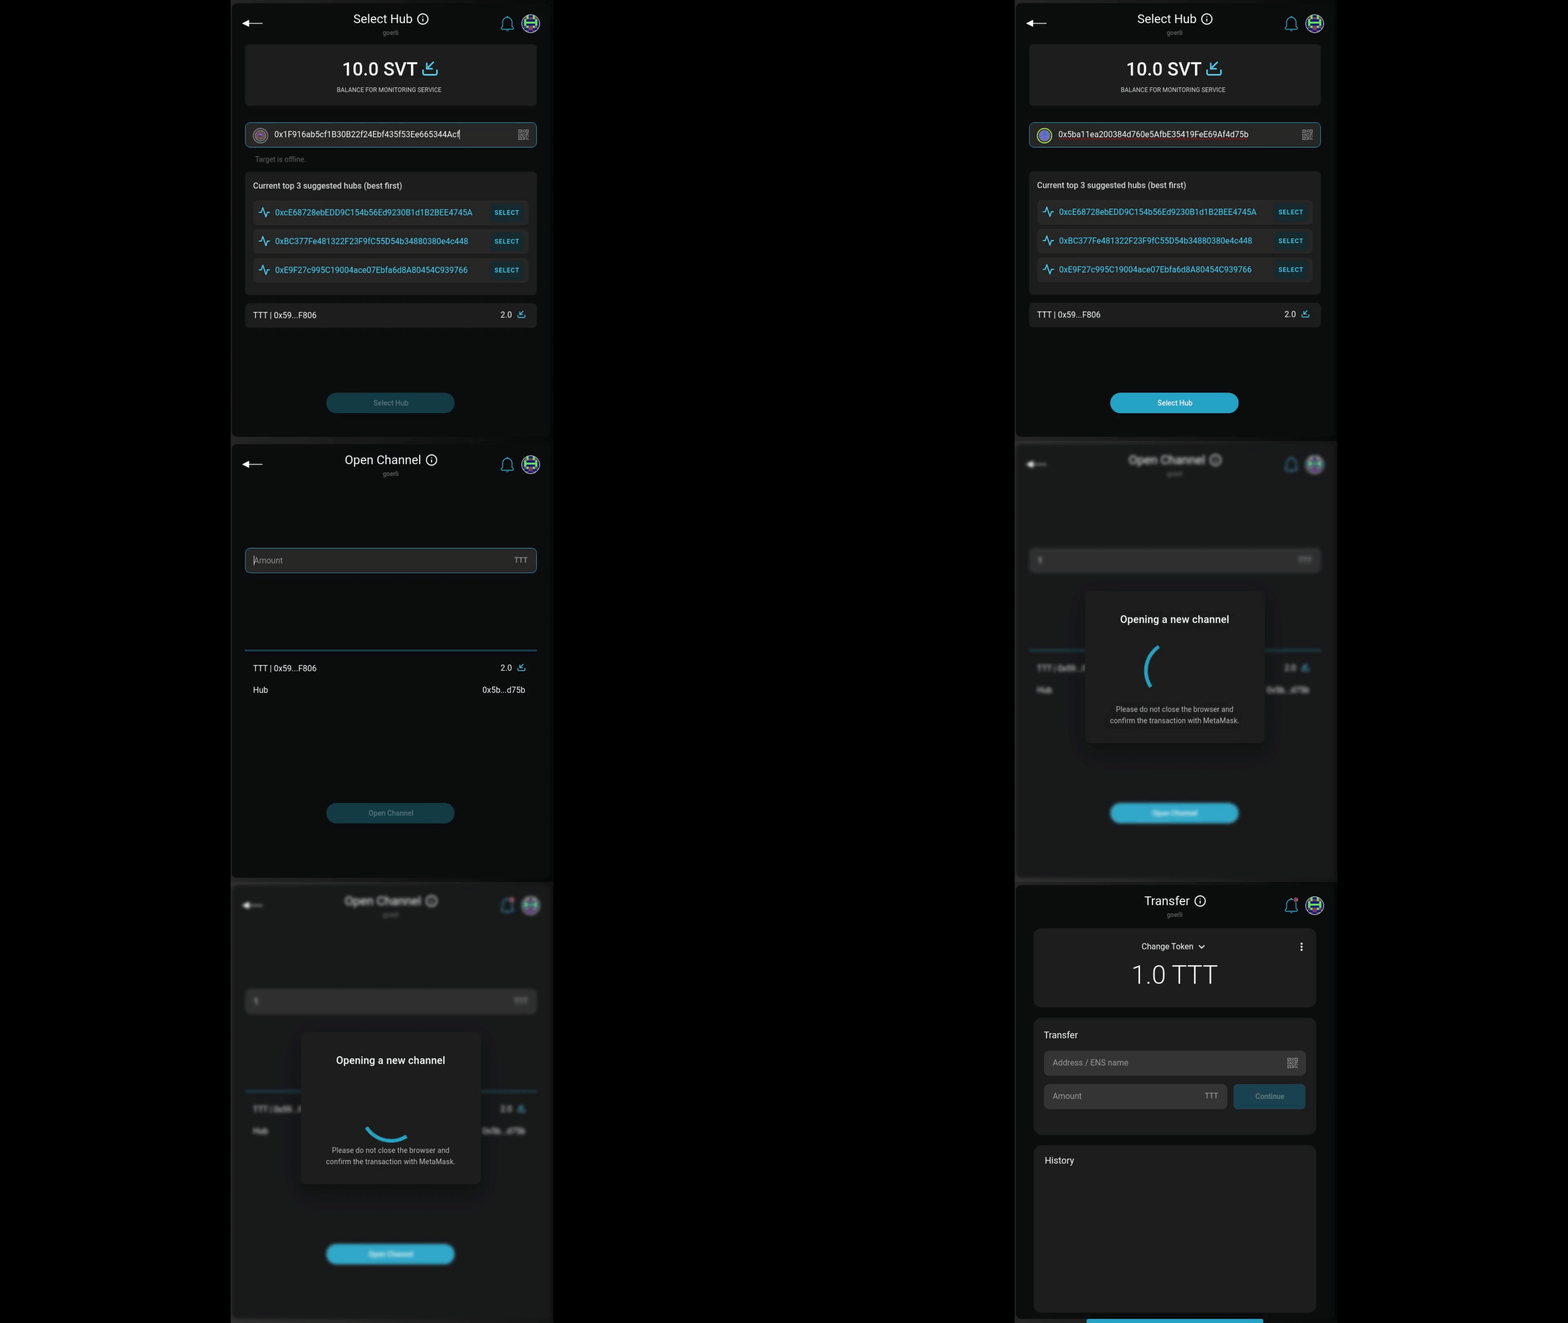
After minting the screen should look something like above.
Opening a Channel With the Hub

After entering the address of the hub click on Select hub and on the next screen enter the amount to be allocated in the channel. Sign the required transactions on MetaMask. When a channel has been opened you will end up on the Transfer screen.

The 3 dots menu next to the capacity of the channel (1.0 TTT in the example above), can be clicked to access the DEPOSIT and CHANNELS options. If the CHANNELS option is clicked a list of available channels is displayed.
